Area Guide#
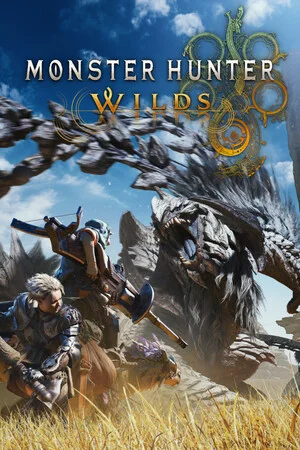
The Forbidden Lands of Monster Hunter Wilds (Monster Hunter Wilds) comprise five fields. Areas & Maps answers “what is this place”; this page answers “once here, how to move, how to fight, what to watch.” Every region unfolds in a fixed four sections: entry and starting point, key monsters and combat notes, terrain use, and material direction. Apex move-by-move breakdowns are not repeated here — see Apex Monsters Guide throughout.
Windward Plains#
Entry and Starting Point#
Windward Plains is the survey team’s first field into the Forbidden Lands, and Base Camp is built here, so the great majority of story Chapter 1 quests start from it. Enter for the first time during Plenty: ride the Seikret around the outer loop of the main road and mark every Pop-up Camp site and gathering route as you go, so any later operation launched from the Plains can cut in nearby. Visibility and gathering yields on the plain drop sharply during thunderstorms and Fallow — keep map-running quests out of those stretches.
Key Monsters and Combat Notes#
The apex is the Flying Wyvern Rey Dau, whose discharge attacks arrive wrapped in a Sandstorm of massive lightning strikes — when the storm kicks up, the threat is not just its body but the strike zones covering most of the plain. Read the sky first: when a Sandstorm warning appears, plan your positions and retreat lines early instead of running once lightning lands at your feet. Chatacabra and the pack-hunting Doshaguma from the early quest lines also live on this plain — the first two lessons for new hunters.
Terrain Use#
The plain is open ground, and that is Rey Dau’s advantage: a Flying Wyvern needs airspace, and the wider the sand, the farther it opens the distance. Conversely, the cover of rock formations and canyon stretches compresses its flight space, so pull the fight toward rocky ground as much as possible. During thunderstorms the dunes and rock bodies can block lightning, but the same cover blocks your line of sight too — before dodging a strike behind cover, decide where your next step goes. The grassland stretch has the best sightlines, ideal for watching a monster’s direction of travel from afar before choosing your entry angle.
Material Direction#
This field’s material mainline is the thunder-element gear line: Rey Dau materials are the core source for thunder-element weapons and discharge-related equipment. Chatacabra and Doshaguma materials power early armor and weapon upgrades — enough to carry you into Scarlet Forest. Mineral gathering is most efficient cleared in one pass during Plenty; yields slide in Fallow, so save the time for focused hunts.
Scarlet Forest#
Entry and Starting Point#
Scarlet Forest unlocks early in the story and connects to Windward Plains through a field connection — ride straight across from the Plains side. The lake terrain is more complex than the plains, so on first entry loop once along the waterline and prioritize opening the higher-ground Pop-up Camp sites: water levels rise during Downpour and low-lying paths flood, so a camp on high ground keeps transfers unaffected in bad weather.
Key Monsters and Combat Notes#
The apex is the Leviathan Uth Duna, its body covered in a water veil, with the densest sighting records during Downpour. It is most active in that weather, so set up water-resistance gear and mantles before departing — your margin for taking a splash grows accordingly. Lala Barina also moves through the woods; its solo threat is small, but it slows pursuit, so do not linger when crossing forest clearings.
Terrain Use#
Open water is Uth Duna’s home field, where its mobility and firepower both max out; pull it toward riverbank shallows and forest clearings and its swimming advantage halves immediately. Fighting in Downpour means accepting one premise: paths that were open may now be river, so confirm the pursuit route on the map before moving. Rising water also changes monster ranges — after rain, look for targets along the new waterline; that beats running the map on old impressions.
Material Direction#
Scarlet Forest’s material mainline is the water-element gear line and aquatic resources: Uth Duna materials support the water-element direction, and the rare fish of the lakes and channels are the signature output of the fishing loop. Plant gathering is plentiful — come during Plenty and clear it in one pass. Gathering during Downpour is inefficient, so save the time for apex hunts.
Oilwell Basin#
Entry and Starting Point#
Oilwell Basin unlocks midway through the story, with the city of Azuz as its base — trade, resupply and quest prep all happen here, making it the survey team’s key foothold in the heart of the Forbidden Lands. The valley floor rises and falls sharply and fuel pools dot the ground, so on first entry start from Azuz and walk the main road downhill to learn it, prioritizing the high-ground Pop-up Camp sites: the valley floor burns during Firespring, and high-ground camps carry the most transfer value.
Key Monsters and Combat Notes#
The apex is the Cephalopod Nu Udra, called the “Black Flame” by the people of Azuz. Its fire attacks and the valley’s fuel-soaked terrain amplify each other, and during Firespring the whole basin enters a high fire-damage state — carry plenty of Cleanser and keep a fireproof mantle stocked. The Fanged Beast Ajarakan shares this window, clearly energized during Firespring with aggression a notch above normal: handle the burning environment before thinking about your damage windows.
Terrain Use#
Lava and oil pools are threats to hunters but home turf for the fire-wielding Nu Udra: its firepower is fiercest fighting beside lava, so pull it onto rocky high ground or into narrow ravines instead of trading blows by the oil pools. High ground favors ranged weapons, and ravines restrict a cephalopod’s movement lines. During Firespring, detour directly around burning ground — the time a shortcut through the fire line saves is less than one fire heal costs.
Material Direction#
Oilwell Basin’s material mainline is the fire-element gear line: Nu Udra and Ajarakan materials are key sources for fire-element weapons and fire-resistance gear, and gunpowder and blast-type gathers are the region’s specialty. Gathering during Firespring is high-risk — schedule mining veins and local specialties for Plenty, and keep Firespring reserved for apex hunts.
Iceshard Cliffs#
Entry and Starting Point#
Iceshard Cliffs is the most three-dimensional of the five fields, with ice walls and cliffs splitting the map into layered structures. On first entry start at the valley floor and spiral upward to learn the routes; above all, memorize the vertical shortcuts — this region’s mount navigation runs more complex vertically than on flat ground, and losing track of vertical paths means losing big monsters that move across layers.
Key Monsters and Combat Notes#
The apex is the Leviathan Jin Dahaad, an enormous ice-element apex predator. Its fight is a tug-of-war across floors: zone changes often run vertical, so decide which layer you’ll re-engage on before pursuing. A Leviathan cruising between the ice walls is the norm here — open ice favors ranged weapons, while melee must watch ice-level drops and footing. This region also holds the game’s one-of-a-kind threat: Frenzied monsters, with the mechanic detailed below.
Terrain Use#
This region’s terrain favors “fighting that respects elevation”: high ground suits ranged output and watching for zone transitions, and drops can be used to dodge the charges of enormous monsters. Conversely, the narrow channels between ice walls favor the cruising Leviathans too — squeezed in, you cannot spread out, so pick open ice or platform layers for the fight and never get dragged into an ice crevice.
Material Direction#
Iceshard Cliffs’ material mainline is the ice-element gear line: Jin Dahaad materials support the ice-element direction, and ice-type gathers and rare small animals are the region’s signature. For endgame players, the region’s more important output is Frenzied materials — where the shards and crystals come from is covered below.
Frenzy Mechanics (Exclusive to This Region)#
Frenzied monsters appear only in Iceshard Cliffs, with the prerequisite of clearing story Chapter 4-2 “A Shadow Lurking in the Dragon Valley” (Hunter Rank HR15). Five Frenzied monsters are confirmed in total, sharing these traits: lower HP than normal individuals but more aggressive, some attacks inflict Frenzy, and they can move zones on their own.
Frenzy judgment sits above the health bar: once the infection gauge appears, landing attacks steadily drains it. Drain it fully and you are cured, entering a buffed state (cured); fail and you enter a debuffed state (infected), taking heavier damage with temporary health unrecoverable. Purging Fruit can press the gauge down but cannot clear it — half a gauge left beats fighting on with heightened damage.
| Material | Source | Output |
|---|---|---|
| Frenzy Shard | Any Frenzied monster; Rarity 6 material | Crafting Rarity 7 gear |
| Frenzy Crystal | Drops only from Gore Magala: 30% carving rotted corpses, 24% Wound destruction | Crafting Rarity 8 gear |
After slaying a Frenzied monster, remember to save it as an investigation (3 hunts max) — if you want steady shard farming, do not skip this entry point. The Frenzy virus system comes from Monster Hunter 4; this game turns it into an Iceshard-exclusive empowerment line, with the system overview in Endgame Systems.
Ruins of Wyveria#
Entry and Starting Point#
The Ruins of Wyveria is not a regular hunting ground; it unlocks with the story’s final chapters, where the key nodes of the story’s second half play out. On your first visit, do not rush the map — just follow the story. Only after the credits does Wyveria open as a free hunting ground, the point to finish filling in camps and gather points. Additional Guardian and Zoh Shia challenges are also issued from here as quests.
Key Monsters and Combat Notes#
This is Guardian territory: construct wyverns built by an ancient civilization and driven by Dragon Torch energy, six individuals in all — Guardian Doshaguma, Guardian Fulgur Anjanath, Guardian Ebony Odogaron, Guardian Rathalos, Guardian Arkveld and more, with Zoh Shia at their head. The survey team’s final target, Arkveld — the “White Phantom” with chain-like wings, once declared extinct — has its final story battle here too. The Guardians’ fighting style breaks from the ecology logic of ordinary monsters, so treat them as “entirely new monsters” in combat and do not copy homework from same-niche regular monsters.
Terrain Use#
Wyveria’s architectural remains provide abundant elevation and cover: pillars and broken walls can cut off Guardian charge lines, and melee fighting tight to a pillar carries more margin; the open ground around the temple plaza favors flying and ranged attacks, so ranged players should actively pull the fight there. When free hunting here after the credits, watch Guardian movement lines from a high point before committing to the ground.
Material Direction#
Guardian hunts feed the Guardian gear line; Zoh Shia returned after the first title update as a repeatedly challengeable High Rank form, and its materials are likewise a key source for endgame gear. Artian Armor unlocks after Hunter Rank HR100: the side quest (Echoes of the Forgotten Forge) never appears on the Quest Board — talk to researcher Fabius directly to accept it.
Endgame Regional Strength Line#
The strongest monster forms in the base game are Arch-tempered (community nickname: “AT”), released as event quests in version order — five in total: Rey Dau, Nu Udra, Nuudra, Jin Dahaad, with Arkveld (HR100) closing the set. Each comes with one Gamma (γ) armor set, five across the game. They push each region’s apex strength to the limit in turn; the full order, dates and gear outputs are in Endgame Systems.
Cross-Region Travel and Shortcuts#
| Point | Details |
|---|---|
| Connected fields | Five fields join seamlessly; cross regions on foot or by mount through the field connections |
| Free starting points | Operations can launch from any unlocked base or Pop-up Camp — no return to Base Camp needed |
| Auto-navigation | Seikret auto-navigation plots the shortest path; hand cross-region pursuit to it first |
| Mounted controls | While riding, you can open the item pouch to sort supplies and swap main/sub weapons |
This movement system pays off most visibly in pursuit battles: when the target changes zones, no panic — redeploy from the nearest camp, let the Seikret plot the shortest path, sort the item pouch and swap weapons mid-ride, and land ready to fight. The Seikret is a non-combat mount that stays with you throughout multiplayer too, unaffected by the Palico standby rules — with three or more hunters in the party, Palicoes are forced to stand by, but the Seikret is not among the restricted. Frenzied monsters move zones on their own, making them the perfect opponent to test this routine on.
Revision note (2026-10-04): this page was rebuilt as a region-by-region action guide, complementing Areas & Maps — that page covers “what is this place,” this one covers “how to move, how to fight, what to watch.” The Arena feature originally misplaced here did not match the page’s scope; quest format details are in Quest Types.