Assault and Support Class Guide#
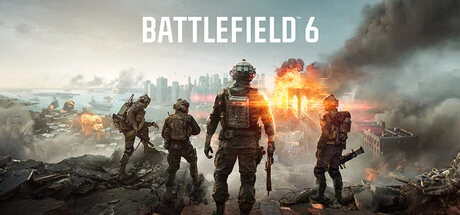
These two classes are the two extremes of infantry combat: Assault owns “how to kill once you are inside”, Support owns “how to stay alive when the fight drags on”. This page breaks down both classes’ gadget logic, training path trade-offs, and practical playbooks.
The Assault Class#
Gadget Kit#
| Gadget | Function | When to Use It |
|---|---|---|
| Second primary weapon | Dual primary setup, two weapon routes | One close, one far: switch to the SMG or short-barrel before entering a building, back to the assault rifle outside |
| Adrenaline injection | Self-healing and status recovery mid-fight | Pop it before a low-HP gunfight, or preemptively before a push to buy an aggression window |
| Flashbang | Blind and breach | Throw it before breaking the door, then slide in and clean up |
| Underbarrel grenade launcher | Fire through walls | When you know there is a gun line behind the wall, fire one round first for an “indirect callout” |
The Assault’s core asset is the dual primary weapon: other classes have a fixed primary-sidearm division, while the Assault can carry two primaries and swap freely. This makes it the only class that can cover both the 5-meter and 50-meter engagement radii at the same time.
Training Paths: Frontliner and Breacher#
| Path | Identity | Best For |
|---|---|---|
| Frontliner (sustained front-line fire) | Reinforced sustained frontal combat | Open-objective tug-of-war, large-flag attack and defense in Conquest |
| Breacher (room-clearing entry) | Reinforced indoor and close-range breaching | Clearing buildings on city maps, first-stage offense in Breakthrough |
The decision criterion: do you spend more time inside buildings or outside? City maps (Cairo, Empire State) favor Breacher; large maps with open ground (Liberation Peak, Mirak Valley) favor Frontliner.
Combat Rhythm#
- Before the doorway: flashbang in, slide through the door, hug cover and set up to clear the first sightline
- In a firefight: the adrenaline injection is not a heal, it is an attack permit — using it means you have decided to press this wave
- Reload discipline: the point of dual primaries is swapping guns during reloads instead of going empty — when one mag runs dry, switch to the second gun and the rhythm never breaks
- Counter-armor: Assault has no rocket launcher; the first reaction to vehicle engine noise is to call the position to your Engineer teammate, not to take it on yourself
How to Pick the Dual Primaries#
The value of the dual primary system lies in “two routes that stagger engagement distances”, not carrying two guns with the same job. The two Season 5 new guns happen to occupy one route each: the Mk 24 assault rifle is built for mid-to-long range with limited magazine capacity, making it the long-end route for open-ground gunfights; the RSPR compact PDW has strong stopping power and better range within its class, making it the close-quarters breaching route — one far, one near, matching the two states of “outside” and “inside”.
When building loadouts, also watch for Class Lock mode: in that mode each class can only use its corresponding weapon types, so both of the Assault’s primary routes must be chosen from assault rifles and PDWs, with no borrowing of the Support’s LMG. Separate the two routes’ identities early so you never end up in Lock mode with two guns doing the same job.
- Full breakdown of the four new guns: Season 5 New Weapons Guide
The Support Class#
Gadget Kit#
| Gadget | Function | When to Use It |
|---|---|---|
| Ammo crate | Resupplies the whole team | Place it behind cover on routes teammates must pass, not at your own feet |
| Healing device | Continuously heals teammates | Top up between firefights, lowest-HP teammates first |
| Deployable cover | Deploys a piece of cover from nothing | “Manufacture” a favorable firing position in open ground |
| Light machine gun (LMG) | High-capacity suppression fire | Objective defense and suppressive fire; the belt-fed advantage pays off in attrition fights |
The Support’s Three Team Weapons#
- Ammo crate placement: put the crate “behind the cover teammates retreat to after each engagement”, not “right under your own feet”. The former benefits the whole team, the latter only you.
- Healing priority: heal teammates who are actively fighting first, then the ones downed and waiting — sustained output stabilizes a front line better than one revive.
- Deployable cover timing: deploy it “when you are being pressured in open ground with no cover”, which temporarily reshapes the terrain in your favor. The destruction system tears walls down; your deployable puts a wall back up.
LMG Suppression Play#
The LMG’s belt capacity defines its tactical role: you are not firing for bursts, you are sealing corridors.
- Objective defense: keep suppressing the doorways and stairwells enemies must pass, forcing them to reroute
- When teammates push: fire on enemy positions from a flank, creating a window where “the enemy dare not poke their head out”
- Note: the LMG’s mobility cost is slow repositioning — when someone gets in your face, do not duel, fall back behind cover and reset
Drag Rescue and Wall-Branched Aim#
Two details of this game’s movement system matter especially for Support. The first is drag rescue: drag the downed teammate behind cover or indoors before reviving, instead of reviving in place under a gun line — the Support is the team’s only source of sustained healing, and dying while rescuing costs the front line two fighters at once. The second is wall-branched aim: bracing against a wall yields a steadier stance, and combined with deployable cover it forms the standard “cover plus braced gun” position routine, partially offsetting the LMG’s slow repositioning.
The same applies on the move: sliding into cover and roll-buffering from high falls are the Support’s survival moves when crossing open ground — the LMG already gives up mobility, and cutting exposure time matters more than trading shots.
The Two Together: Spear and Shield of the Attack#
| Scenario | What Assault Does | What Support Does |
|---|---|---|
| Building breach | Flashbang plus slide-in room clear | Ammo crate downstairs plus deployable cover sealing the stairwell |
| Open objective | Frontliner holds the front line | Deploy cover, then set up the LMG to seal the line |
| Attrition fight | Dual primaries rotate to keep firepower up | Ammo crate plus healing loop keeps the line from collapsing on status |
| Vehicle encounter | Call the spot, pop smoke to open distance | Deploy cover to block the vehicle, cover the Engineer teammate’s output |
Common Training Path Mistakes#
- An Assault picks Breacher but spends the whole match holding long lines outdoors — the path’s strengths and your actual positioning are misaligned
- A Support treats the deployable cover as a “personal bulletproof plate” — it is a team terrain tool, and placing it for teammates pays more than placing it for yourself
- An Assault carries two primaries with the same job — one close-quarters route plus one mid-to-long route is the design intent of the system
Coordination Points with the Other Classes#
| Teammate Class | What You Give Them | What They Give You |
|---|---|---|
| Engineer | Support: cover blocking rocket launcher sightlines; Assault: call vehicle positions | Repair support, anti-armor firepower |
| Recon | Assault: focus fire along the laser designation; Support: heal the drone operator’s static post | Enemy position intel, long-range suppression |
How Season 5 Balance Affects Infantry#
Season 5’s balance changes directly improved infantry survival in open ground: the Recon helicopter’s 70mm FFAR rocket splash damage was nerfed by 30%, so it no longer one-shots infantry at common engagement distances — this means the Assault holding gun lines on open maps like Liberation Peak and Mirak Valley, and the Support deploying cover and setting up an LMG in the open, both enjoy more positioning forgiveness than before the season. As for the mobile AA gun buff reshaping the anti-air picture, that is an Engineer and vehicle-side topic; infantry do not need to change their play because of it.
- Full list of air threats and how to counter them: Air Vehicles Guide
Further Reading#
- How to set up gadgets and attachments: Attachment Point Customization System
- How to pick weapons: Weapons: Assault Rifles and PDWs, Weapons: LMGs and Snipers
- Squad and class synergy: Class System Overview, Engineer and Recon Class Guide