Area Guide: Revelwood and the Nomad Highlands#
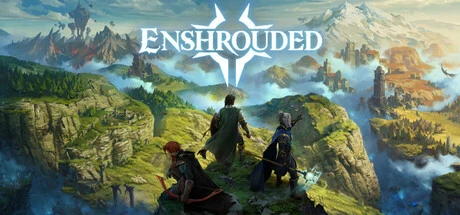
On the continent of Embervale in Enshrouded, Revelwood and the Nomad Highlands are the two regions that bridge early and late game: the former hides the capital Pikemead’s Reach and the boss fight atop The Pike, while the latter holds the Cradle of Dusk and the skull required for the fourth-tier Flame Altar upgrade. Per the progression order compiled from community sources, after finishing the Springlands starter zone and felling the Scavenger Matron, players push along this route toward the mid-to-late continent.
This page walks both regions in the order of regional position — capital and cliff top — Cradle of Dusk — satellite altar — late-game hub. The universal siting methodology (the six siting principles, the Shroud-line test, glider synergy) is covered in the Base Location Guide; this page focuses on the regions themselves: what locations exist, which bosses to fight, and which altar tier each skull feeds.
Regional Position: Coordinates on the Progression Route#
Embervale’s known regions include the Springlands, Low Meadows, Revelwood, the Nomad Highlands, the Kindlewastes, the Albaneve Summits and Veilwater Basin, with Pikemead’s Reach as the capital and 5 Ancient Spires scattered across the map as fast travel points. Revelwood and the Nomad Highlands sit squarely in the middle of this progression chain: the skulls for the third and fourth Flame Altar tiers both come from these two regions.
| Progression Node | Region Boss | Region | Skull Destination |
|---|---|---|---|
| Early segment (Springlands side) | Scavenger Matron | Starter areas around the Springlands | Third-tier altar upgrade material, also a grappling hook upgrade material |
| First half of this page | Fell Wispwyvern | Revelwood, atop The Pike at the capital Pikemead’s Reach | Third-tier altar upgrade material |
| Mid-route transition | Vukah Brawler | Arena sites like Ceremony Hill in the Low Meadows | No altar upgrade link recorded in community sources |
| Second half of this page | Fell Monstrosity | Nomad Highlands, at the Cradle of Dusk and elsewhere | Fourth-tier altar upgrade material |
| Later regions | Fell Sicklescythe | Kindlewastes | Fifth-tier altar upgrade material |
The table shows where the two regions on this page sit along the skull chain: Revelwood delivers tier three, the Nomad Highlands deliver tier four, with the arena champions of the Low Meadows in between. Skulls are chance drops, and bosses respawn on server restarts or world reloads — if an upgrade is stuck, go back and re-fight.
Revelwood: The Capital Pikemead’s Reach and The Pike#
This segment’s main-quest goal is highly focused: complete the ‘Reach The Capital, Pikemead’s Reach’ quest, push through to the capital, then climb The Pike to take down the Fell Wispwyvern. The quest line paces exploration clearly — first get comfortable with the Shroud and gathering on the region’s fringe, then converge toward the capital.
| Location | What to Explore | Action Criteria |
|---|---|---|
| Pikemead’s Reach (capital) | Endpoint of the ‘Reach The Capital, Pikemead’s Reach’ main quest, with concentrated quest lines | Top up Shroud Cores and supplies on the region’s fringe before arriving, then push the capital quests segment by segment |
| The Pike cliff top | The Fell Wispwyvern’s boss arena | Arrive after clearing the capital quest; plan your escape path and respawn point before engaging |
| Regional Shroud zones | Gathering points such as Elixir Wells and Shroud Roots | Confirm your countdown margin before entering the Shroud; pick the nearest building zone or a spot beyond the Shroud boundary as your escape target |
The capital itself is also a landmark in siting terms: placing the satellite altar in Revelwood is largely about the commute radius of the capital quest line. Placement thinking continues in the satellite altar section below.
How to Fight the Fell Wispwyvern#
Per the mechanics compiled from community sources, the Fell Wispwyvern’s most critical window is its summon action: it locks into a stagger animation while roaring to call minions, and that is the main damage window. In practice, play around this rhythm — stay mobile and bank damage resources the rest of the time, then dump every burst into the few seconds it rears back to roar; the minions themselves are the secondary threat.
The post-kill reward chain is worth memorizing:
- The skull is a chance drop; if it does not drop, wait for the respawn and re-fight — the boss returns after a server restart or world reload.
- The skull is used for the third-tier Flame Altar upgrade; the Scavenger Matron’s skull also points to tier three, and the exact cost combo for that tier is subject to the actual 1.0 update.
- In other words, if you want to push the altar to tier three during the Revelwood phase, the Wispwyvern fight is unavoidable.
The Nomad Highlands: The Cradle of Dusk and the Fell Monstrosity#
The Nomad Highlands’ signature opponent is the Fell Monstrosity, and its arena lies at the Cradle of Dusk and similar sites. The lore recorded in community sources also explains its origin: the alchemist Ikora experimented on Shroud spores with the Black Cauldron and created this thing — which also explains why it is so deeply tied to the Shroud ecosystem.
| Item | Content |
|---|---|
| Arena | The Cradle of Dusk and other sites in the Nomad Highlands |
| Lore | Created by the alchemist Ikora experimenting on Shroud spores with the Black Cauldron |
| Skull use | Fourth-tier Flame Altar upgrade material, chance drop |
| Signature drops | Community sources record Shroud Crystals as drops, a crafting material for legendary weapons (single-source claim; defer to the actual 1.0 update) |
| Respawn | Respawns on server restart or world reload |
The Fell Monstrosity’s skull is the bridging link in the upgrade chain: upstream is Revelwood’s Wispwyvern at tier three, downstream is the Kindlewastes’ Fell Sicklescythe at tier five. The Nomad Highlands therefore act as the relay station of the skull chain — a property that also shapes its role in siting routes, revisited in the late-game hub section below.
Stage-Two Satellite Altar: Putting a Forward Camp in Revelwood#
The three-stage community consensus route is: first base in the Springlands, stage-two satellite altar in Revelwood, late-game central hub in the Nomad Highlands. The full logic of the three-phase capital moves and the six siting principles are laid out in the Base Location Guide; this page answers only ‘why Revelwood for stage two’ from the regional angle, with three criteria:
- Quest and landmark density: the capital Pikemead’s Reach concentrates quest lines; with the satellite point in Revelwood, trips toward the capital need no cross-region trek, minimizing the commuting cost of quest progression.
- Shroud gathering radius: Revelwood’s Shroud zones also hold Elixir Wells and Shroud Roots; parking the satellite altar’s building zone on high ground outside the Shroud line dramatically shortens gathering round trips; for the buffer between base and Shroud line, see the Shroud-line test in the siting guide.
- Skull chain relay: the tier-three skull boss is right here at The Pike; during re-fights the satellite point can serve as a respawn and resupply fulcrum, letting you withdraw fully loaded right after the kill.
For loadout, keep the satellite point’s lightweight four-piece set: altar, storage, a bed, and a basic workbench. Leave the heavy production — workshops, farms, full production lines — to the Springlands HQ; construction plans are in Base Building and the Five-Zone Layout.
Late-Game Hub: The Nomad Highlands’ Hub Value#
For the late game, community consensus places the central hub in the Nomad Highlands. Our siting page’s position is that it lies in the mid-to-late band of the continent; this page adds three regional-angle reasons:
- Geographic reach: the shortest radiation distance toward the Kindlewastes and the Albaneve Summits; late-game cross-region gathering and boss circuits all launch from here.
- Skull chain relay: the tier-four skull (Fell Monstrosity) is in this region and the tier-five materials in the Kindlewastes — a hub in the middle shortens both ends of the upgrade route.
- Northern materials outpost: community sources note that further north yield Goo, Indigo Plants and copper ore; a hub in the Nomad Highlands pulls the northern gathering radius into daily commute range.
For operational details — the active altar cap, planning the fast travel network, and stretching building zones toward the Shroud boundary — see the Flame Altar System Guide; when the hub needs all five artisans to move house, see housing and production-line notes in Artisan NPCs and Production Chains.
Pre-Entry Checklist#
Before entering these two regions, run the following self-checks to save most of the rework time:
- Skull chain progress: are the tier-three skulls from the Scavenger Matron and Fell Wispwyvern in hand. The Nomad Highlands’ Fell Monstrosity maps to tier four; skipping tiers means your Flame level lags the regional pressure, and you will be on the back foot everywhere in the Shroud.
- Shroud Core reserves: run regular Shroud gathering and the alchemy crafting line in parallel — 10 Shroud Spores plus 10 Shroud Liquid craft 1 Shroud Core; the crafting line is often overlooked, and stockpiling for concentrated conversion when a level gate hits saves trips into high-risk Shroud zones.
- Escape planning: plan the retreat from boss arenas and deep Shroud zones first; building zones are Shroud-immune safe areas; when you must work near the Shroud, prioritize adding an outpost altar beyond the Shroud boundary rather than dragging the main base into it.
- Damage rhythm: the cliff-top boss’s stagger window opens while it summons minions; save burst skills for that window and conserve stamina during the mobile phase — far better value than trading blows head-on.
How 1.0 Affects This Page#
1.0 is scheduled to launch on October 15, 2026 (simultaneously on Steam and PS5); its impact on these two regions concentrates on the progression systems, while the exploration goals themselves are unchanged:
- All skill trees reset, triggered automatically at login with every point refunded — regional exploration pacing is unaffected, but builds need re-planning; see the Enshrouded 1.0 Changes Explained.
- The level cap rises from 45 to 50 and the gear cap to 55, raising the growth ceiling across both regions.
- The developers have not announced a server wipe; hosting providers recommend backing up your world before updating; the actual state of altars and world progress after the update is authoritative.
- The names of the new biomes added in 1.0 have not been announced; whether they affect the borders and POIs of these two regions will be verified and revised after launch.
Further Reading#
- Flame Altar System Guide — skull mapping table, building zone sizes and the active cap
- Base Location Guide — the three-phase capital move route and the six siting principles
- Base Building and the Five-Zone Layout — interior planning for satellite points and hubs
- Artisan NPCs and Production Chains — where the five artisans are and how to move them
- Game Overview and World Lore — the Embervale continent, Ancient Spires and faction lore
- Enshrouded 1.0 Changes Explained — the official position on the skill tree reset and new biomes