Warfare Maps Guide#
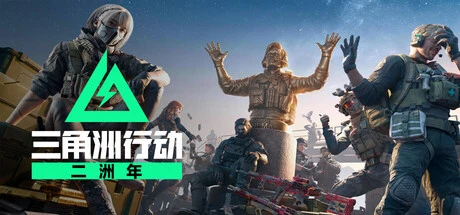
The mainstay Warfare map pool currently consists of three classic maps (Ascension, Cracked, Threshold) plus Shafted, Trench Lines, Knife Edge, Trainwreck and others, with Moge Old Town joining in S11. This page breaks down each map’s zone structure, vehicle rules, and tactical priorities. A note on player counts: media coverage says 32v32, with an alternative figure of 24v24 (possibly the mobile-port count); officials have not unified the number — defer to what you actually see in game.
1. Ascension (the Classic Attack-and-Defense Map)#
Ascension is the model of the four-zone attack-and-defense map: Beachhead, Mountain, Caves, Spire Platform.
| Zone | Terrain traits | Tactical priorities |
|---|---|---|
| Beachhead | Open landing area | The attackers’ opening assault zone; AA vehicles and fire support provide suppression |
| Mountain | Deep sloped ground | The infantry tug-of-war belt and a high-value zone for snipers and Recon operators |
| Caves | Underground tunnel system | Vehicles can ride an elevator into the caves — tanks entering the caves are Ascension’s signature design |
| Spire Platform | Commanding high ground | The final showdown zone; vertical control decides the outcome |
Vehicle Rules on Ascension#
- No vehicles can be deployed in Zone D; use points to call in artillery / missile fire support instead — Zone D is a pure infantry battlefield.
- MBT spawns are fixed: defenders get theirs in the elevator garage during Phase B, attackers on the respawn-area highway.
- The cave area’s “vehicle elevator” is the only vehicle-transport design of its kind in the game — defender tanks can enter the cave area from underground, and attackers must plan for early warning.
Ascension Attack and Defense Game Plan#
- Attackers: the beachhead breakthrough needs vehicle coordination (tanks leading + infantry following); pre-arrange Engineers (quick-set barricades) and Support operators for vehicle-free zones like the caves and Zone D.
- Defenders: the elevator garage’s tank spawn is the first bargaining point of the match; use snipers and Recon on the mountain slopes to suppress attacker deployment.
2. Cracked (the Urban Combat Map)#
Cracked is a three-zone street-fighting map: Rockside Village, Temporary Camp and Slums, Munitions Warehouse and Offices.
| Zone | Terrain traits | Tactical priorities |
|---|---|---|
| Rockside Village | Village alleys | A high-frequency close-quarters area and a shotgun/SMG advantage zone |
| Temporary Camp and Slums | Dense building cluster | Building offense and defense; home turf for Engineers (sonic traps, the spider drone) |
| Munitions Warehouse and Offices | Indoor strongpoints | The core of the endgame contest; door breaching and indoor control |
The core of a street-fighting map is control of building floors: Engineer lockdown skills and Recon wall-penetration skills both pay off far more on Cracked than on open maps. Armored vehicles have limited mobility in the alleys and infantry is the protagonist — of the three mainstay maps, this is the most “pure shooting” one.
3. Threshold (the Port City Map)#
Threshold is a three-zone port city map: Downtown, Evacuation Corridors, Surveillance Area and Weather Room.
| Zone | Terrain traits | Tactical priorities |
|---|---|---|
| Downtown | A mix of open city blocks and buildings | Mixed vehicle-and-infantry pushes |
| Evacuation Corridors | Connecting passageways | The choke point for rotations and intercepts |
| Surveillance Area and Weather Room | Elevated monitoring facilities | Contests for high ground and surveillance sightlines |
Threshold’s “evacuation corridor” design makes rotation play the soul of the map: whichever side controls the corridors controls the battlefield’s rhythm. The downtown buildings plus port structures give amphibious vehicles (the AAV amphibious assault vehicle, assault boats) room to enter the stage.
4. Moge Old Town (the S11 New Map)#
Added with S11 “Stars”, with two exclusive mechanics:
| Mechanic | Detail |
|---|---|
| Convoy Breakout mechanic | A battlefield structure built around convoy mobility and escorting as the main line |
| Black Hawk helicopter formation support in the final phase | Helicopter formation support in the endgame, paired with S11’s newly implemented drag rescue |
Moge Old Town elevates “vehicle coordination” to the core of its map design: convoy breakout means vehicle formations themselves are the primary combatants. Adaptation tip: scale the “vehicle-spawn bargaining” you learned on Ascension up to the convoy level — from infantry-tank coordination to convoy coordination.
5. Other Maps#
Shafted, Trench Lines, Knife Edge, Trainwreck and the rest belong to the Warfare pool (per wiki coverage); this page will not expand on each, but the general principles are:
- Trench-Line-style maps: terrain cover is dense, so throwables and sonic suppression gain amplified value.
- Shafted-style maneuver maps: vehicle mobility and rotation speed set the tempo.
Terrain Comparison Table for the Maps#
| Map | Terrain type | Vehicle weight | Engagement range |
|---|---|---|---|
| Ascension | Beachhead / mountain / caves / spire mix | High (including the cave line that elevator-transports tanks) | All ranges |
| Cracked | Urban building cluster | Low (restricted by the alleys) | Close to mid |
| Threshold | Port city | Medium (amphibious vehicles can take the field) | Mostly mid |
| Moge Old Town | Convoy maneuver structure | High (the convoy is the core) | Mid to long |
Choosing a map is simple: go to Cracked to practice gunplay, Ascension to practice vehicles, Moge Old Town to practice convoy coordination, and Threshold for the all-around experience.
6. Universal Tactical Framework#
| Phase | Advice |
|---|---|
| Opening | First confirm this match’s vehicle spawns and no-vehicle zones like Zone D, and plan how to spend your points |
| Midgame | Vehicle team fights are the score engine; infantry-tank coordination beats everyone freelancing |
| Rescue | After S11’s drag rescue, drag downed teammates into cover before reviving — score and survival both win |
| Final phase | Stockpile battlefield support early for the endgame zones of attack-defense maps (Spire Platform, etc.) |
| Settlement | Personal score ranking pays out Mandel Bricks (top 20% weekly get 1 / cap 2) — your score strategy is your income strategy |
7. Operator Fit Summary Table#
| Map | Recommended operator logic |
|---|---|
| Ascension | Uluru (quick-set barricade to cross open ground) + Silverwing (threat detection against snipers) + Butterfly (auto-revive) |
| Cracked | Shepherd / Hackclaw (building lockdown) + Luna (arrows to sweep buildings) + Stinger (group healing) |
| Threshold | Vyron (magnetic bombs against vehicles) + Luna + Stinger |
| Moge Old Town | A convoy-coordination map — one Engineer and one Support, with Assault adding firepower |
For squad details, see Operator Unlocks and Team Comps and Warfare Mode Mechanics.
— Wubian, NTGame Editorial