Campaign Walkthrough (Part 1)#
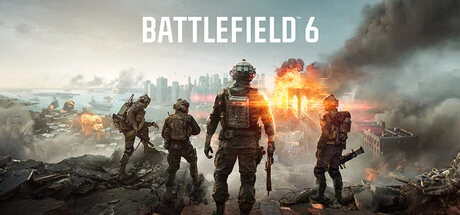
Battlefield 6’s single-player campaign has 9 missions, roughly 4-6 hours in total. You play a member of the elite US Marine Corps squad Dagger 13, fighting the private military company Pax Armata during the 2027 NATO crisis. This page covers the first four missions; the last five are covered in Campaign Walkthrough (Part 2).
Read This First: The Right Way to Play This Campaign#
The campaign design has one clear hidden thread: the members of Dagger 13 each map to one of the multiplayer class specializations. The single-player campaign is effectively the multiplayer mode’s “class tutorial” — every playstyle you use in the story (assaulting, anti-armor, resupply, recon marking) carries one-to-one into multiplayer. Play the campaign with that perspective and the 4-6 hours stop being “just the story” and become a complete onboarding drill.
| Your campaign habit | How it carries into multiplayer |
|---|---|
| Learning to drag teammates behind cover before reviving | The same revive works in multiplayer, and it is even safer there |
| Blowing open new paths with explosives | Destruction is a core breaching tool in multiplayer |
| Bracing against walls to engage distant targets | A universal technique for reducing recoil sway in multiplayer |
Mission 1: Always Faithful#
Role in the campaign#
The opening mission. “Always Faithful” is a rendering of the Marine Corps motto Semper Fidelis; the mission is an introductory chapter that teaches you the core moves of the kinesthetic combat system and the basic rhythm of firefights.
Gameplay essentials#
- Complete every tutorial move: sliding, wall-bracing, corner-peeking, rolling out of high falls — this game’s gunplay is built on these moves; skip the tutorials and you will be relearning them in every later mission
- Get familiar with drag revives: this is the most visible team mechanic separating the game from older entries; practice “drag behind cover first, then revive” from mission one
- Test the difficulty first: the campaign supports difficulty selection (listed as Adjustable Difficulty on the Steam store page); players unsure of their aim should start on Standard and chase higher-difficulty achievements on a second run
Mission 2: The Rock#
Role in the campaign#
“The Rock” is the Rock of Gibraltar — the official store page’s campaign pitch explicitly includes “Storm the beaches of Gibraltar”. A fortress-on-the-rock scenario and an amphibious assault mission.
Gameplay essentials#
| Phase | Key points |
|---|---|
| Beach landing | Covering fire on the beach is dense; advancing between cover beats sprinting in a straight line |
| Fortress assault | The fortress interior has many passages; watch for extra routes opened by the destruction system |
| Wrap-up | Many enemies hold high ground; wall-bracing and corner-peeking are key to reducing exposure |
Among the highlighted Steam achievements is “Rock of Gibraltar”, which literally matches this mission — check the in-game achievement list for exact unlock conditions.
Mission 3: Operation Gladius#
Role in the campaign#
A mission named after an operation codename, part of the set-piece combined-arms chapters. Gladius (the Roman short sword) hints at a frontal-assault style of fighting.
Gameplay essentials#
- Learn to read the staging rhythm: progress in this kind of “operation” mission depends on periodic fire preparation — move with the squad’s rhythm, do not jump the gun
- Watch the engineer role: this mission involves dealing with fortifications, which is where engineer equipment proves its worth
- Destruction first: when a stronghold will not fall from the front, first ask “is there a wall I can blow”
Mission 4: Night Raid#
Role in the campaign#
A night infiltration mission. The name Night Raid states the playbook directly: stealth and raids in low-visibility environments.
Gameplay essentials#
| Phase | Key points |
|---|---|
| Infiltration | Favor stealth routes in low visibility; the cost of being spotted and forced into a firefight is high |
| Raid | The tempo after the raid kicks off is extremely fast — scout your withdrawal route before you commit |
| Fire discipline | Muzzle flashes and explosions are amplified at night; reposition more often than you would in daytime missions |
General night-fighting advice#
- Brightness is adjustable in the options (the game offers 600-plus settings); before a night mission, confirm the image is neither blinding nor pitch black
- In night fights, sound information beats visual information — play with a headset
Class Mapping for the First Four Missions#
| Mission | Dominant class experience | The multiplayer homework it maps to |
|---|---|---|
| Always Faithful | Core moves for every class | The four moves of the kinesthetic combat system |
| The Rock | Assault (amphibious assault) | Frontal firefights and cover discipline |
| Operation Gladius | Engineer (fortification work) | Anti-fortification and destruction |
| Night Raid | Recon (infiltration) | Stealth, marking, C4 |
General Campaign Tips#
- Revives before kills: drag downed teammates behind cover first, then revive — the AI teammates in the campaign follow the same team logic
- Explosives are keys: when a door, wall, or floor blocks you, look for explosives first — this game has almost no “paths that cannot be opened”
- Difficulty and length: the full run is 4-6 hours; focus on the experience on your first playthrough and chase achievements and higher difficulty on the second
- Achievement anchors: there are 53 Steam achievements in total; the highlighted ones include Stand Alone, Rock of Gibraltar, Devil in the Dark, Secret Service, Damned If You Do, Cloak and Dagger, In Memoriam, Dogs of War, and Hounds of War — most point to campaign and multiplayer milestones, with in-game conditions taking precedence
Further Reading#
- Last five missions: Campaign Walkthrough (Part 2)
- Class system mapping: Class System Overview
- Movement system details: Game Overview and Setting