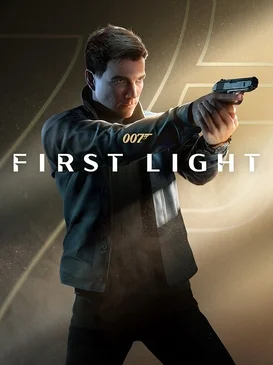
007 First Light Weapons Compendium#
Let’s get one thing straight: the arsenal in 007 First Light doesn’t win on quantity. There is no “30+ guns split across five categories” list — that claim is a widespread misreading.
The firearms here are built around one clear division of labor: exactly enough options for when shooting becomes unavoidable, while the genuinely effective weapons tend to be the unremarkable objects lying around each scene.
1. The Three Firearm Categories#
| Category | Characteristics | Main Source | Best For |
|---|---|---|---|
| Pistols | The most reliable option at mid range, available suppressed or standard | Default kit / picked up in the field | Stealth backbone and fallback in open firefights |
| Rifles | High rate of fire and big magazines, but mediocre long-range accuracy | Mostly looted from enemies | Emergency firepower once a firefight has already started |
| Shotguns | Huge close-range damage, slow rate of fire | Late-game security personnel | Clearing space at point-blank range |
The core idea: rifles and shotguns behave more like “temporary gear” in this game — they usually come off enemies, and they usually enter the picture only once the situation has already slipped out of control.
2. Pistols: The Everlasting First Pick#
| Type | Characteristics | How to Use Them |
|---|---|---|
| Suppressed pistol | Quiet report, unlikely to blow your cover | Stealth backbone; one-shot headshots against unarmored targets |
| Standard pistol | More stopping power, far louder | The fallback once stealth has already broken down |
Pistols are the most “dependable” weapon in the game: solid at mid range, a relatively generous ammo supply, and the suppressed variant preserves your stealth rhythm. If a problem can be solved with a pistol, don’t swap to a rifle.
3. Rifles and Shotguns#
- Rifles: rate of fire and magazine size are real advantages, but long-range precision is poor — favor short bursts over holding the trigger; best used to suppress enemies when you’re surrounded;
- Shotguns: capable of dropping multiple targets at very close range, but slow to fire and slow to reload, and nearly useless in open ground.
Both categories sharply raise your exposure risk — the moment you draw one, you have effectively announced that things have moved to a forced assault.
4. Environmental and Improvised Weapons (The Game’s Real “Arsenal”)#
| Weapon | How to Use It | Best For |
|---|---|---|
| Fire extinguishers | Shoot to detonate, or shove an enemy into one | Area damage |
| Chandeliers / hanging objects | Shoot out the mount | Silent kills from above |
| Live-wire floors | Create zones of water + exposed wiring | Lockdowns and multi-kills |
| Explosive barrels | Shoot to detonate | Grouped enemies |
| Bricks / wrenches | Throw or swing up close | Distraction, non-lethal takedowns |
| Billiard balls / small objects | Throw to make noise | Directed lures |
| Empty guns | Hurl them | Brief stagger, opening a window to subdue |
| Display boards and other structures | Shoot to produce sparks and smoke | Visual cover and distraction |
Why don’t they cost ammo? Because they are simply part of the environment — used well, they let you clear an entire area without alerting anyone else on the map.
5. Weapon Skins#
The “weapon progression” in this game shows up almost entirely as cosmetic skins, not stat upgrades:
| Source | Contents |
|---|---|
| Account-linked rewards | Skins such as “Gilded Wraith” |
| Preorder / Deluxe Edition | The “Agent’s Mark” weapon skin plus several special-edition looks |
| Legacy Edition | Additional physical or collector-oriented content |
Skins have zero effect on damage, accuracy, or any other stat.
6. Recommended Loadouts#
| Playstyle | Weapons | Notes |
|---|---|---|
| Ghost (pure stealth) | Suppressed pistol | Stay out of firefights as much as possible |
| Balanced agent | Suppressed pistol + environmental weapons | Stealth first, environment fills the gaps |
| Assault | Pistol + looted rifles/shotguns | You’re already in a firefight; lean on raw firepower |
7. Three Rules of Thumb#
- Environment first, guns second: environmental weapons cost no ammo and are often silent;
- Suppression over escalation: if you can solve it without being spotted, don’t escalate the situation;
- Don’t worship firepower: this is not a shooter — the gun is a “last resort”, not a “primary tool”.
8. Common Misconceptions#
| Misconception | Reality |
|---|---|
| “The game has 30+ guns in five categories” | False. The arsenal is lean and built around clear roles |
| “Weapons can be upgraded” | They can’t. There are no stat upgrades, only cosmetic skins |
| “There are weapon tiers / rarity levels” | Nope. No rarity or grading system exists |
| “Carrying a rifle is safer” | It actually means more exposure and more ammo burned |
9. How the Arsenal Changes by Chapter#
| Stage | Weapons Mostly Available | Flavor |
|---|---|---|
| Prologue (Iceland) | Mostly pistols | Tutorial-flavored; try not to fire at all |
| Training (Malta) | Pistols (including training guns) | Practice suppression and precision |
| Slovakia | Pistols + environmental weapons | A large sandbox level where environmental kills shine |
| Mauritania | Pistols + looted rifles | Black-market setting; watch your exposure risk |
| London dinner party | Pistols (suppressed) | A social occasion; stay as quiet as possible |
| Webb Industries / Vietnam | Pistols + rifles | Restricted zones and a resort; mixed scenarios |
| Antarctica | Pistols + shotguns | A long infiltration; silence comes first |
| Finale | Pistols + environmental weapons | A defensive battle; use the arena to its fullest |
10. Weapons, Challenges and Achievements#
A portion of the challenges and achievements are tied to how you use weapons: shooting a weapon clean out of an enemy’s hand, dropping a target with consecutive leg shots, or hitting an enemy mid-throw while he’s lobbing a grenade. All of them can be completed on any difficulty, and all of them can be practiced after the credits via chapter select or TacSim — so even if your aim was shaky on a first playthrough, there is plenty of time to clean them up.
Treat the whole arsenal the same way: the pistol does the work, the environment does the damage, and the rifle is what you grab once the plan has already failed.