Squad Coordination Mechanics#
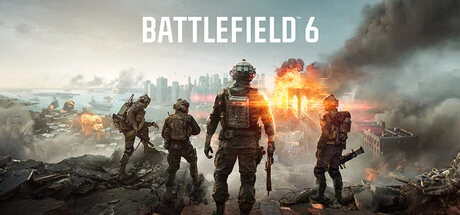
The official Battlefield 6 store page has one defining line: “the deadliest weapon is your squad.” Four classes, drag-and-revive, class-locked mode — almost every system in this game pushes players toward “playing together.” This page covers how to use squad mechanics in real matches.
Why the Squad Is the Core#
| Mechanic | Solo play | Squad play |
|---|---|---|
| Class loadout | You have only one kit | Four complementary kit systems |
| Revive | Die and wait to respawn | Teammates drag you behind cover first, then revive |
| Intel | Only your own view | Recon drones plus the whole squad calling targets |
| Ammo | Run dry and hunt for resupply | The Support’s ammo crate is always nearby |
| Vehicles | Nobody repairs | An Engineer repairs the whole way |
The official design has a hidden thread here too: in the campaign, the members of Dagger 13 map onto the multiplayer class specialties — the campaign is teaching you “what a complete squad looks like.”
Standard Roles in a Four-Class Squad#
| Class | Squad role | Key actions |
|---|---|---|
| Assault | The spearhead — first one into the objective | Flash the door, slide-charge the breach, swap primaries to change range |
| Engineer | Shielded flank — anti-vehicle and vehicle protection | Hit side armor, seed mines as warnings, repair alongside vehicles |
| Support | The logistics line — ammo and healing | Place ammo crates on routes, deploy cover, lock down lanes with an LMG |
| Recon | The eyes — intel and long-range control | Drones to open the map, laser designation, snipers to seal lanes |
Composition principle: a full four-class lineup is the optimal answer. When matchmaking cannot fill it, Support has the highest priority (ammo and healing are resources no other class can self-supply), and Engineer comes second (enemy vehicles must have a counter).
Drag and Revive: The Most Important Team Action in the Game#
The kinesthetic combat system’s drag-and-revive rewrites the revive flow: drag the downed teammate behind cover first, then revive. Three rules:
- Drag first, revive second: reviving right next to the body stakes both your lives at once — drag the person out of the line of fire first
- Reviver calls position: you are unprotected during the drag and revive, so tell your teammates “I’m reviving” so they can hold the angles for you
- The downed player stays useful: even from the downed view you can call targets — use your camera to spot enemies for teammates, more useful than staring at the revive bar
Callout Standards (Possible Even Without Voice Chat)#
A random squad without voice chat can still pull off 80% of the coordination using in-game markers and gesture language:
| Situation | Action |
|---|---|
| Vehicle spotted | Mark it + type its type (tank / helicopter) |
| Sniper lane spotted | Change route + warn the squad |
| Out of ammo | Move to the Support’s ammo crate instead of waiting to die in place |
| Downed | Sweep your camera over enemies and call targets for the reviver |
Voice squad callout template: bearing + unit type + count (e.g. “two o’clock, one tank plus an infantry squad”). No tactical jargon needed — get the information structure right and it works.
Fixed-Squad Tactics: Four-Class Formations#
| Tactical scenario | Formation | Key points |
|---|---|---|
| Urban breach | Two Assaults up front, Support in the middle, Engineer behind | Flash first, Support feeds ammo, Engineer counters the counterattack |
| Open-field push | Vehicle leads, infantry on the flanks, Recon in the rear | Infantry watches the vehicle’s blind spots, vehicles tank the line for infantry |
| Objective defense | Support holds the point, Recon on the perimeter, Assault mobile | Ammo crates and cover stay fixed; the mobile slot counterattacks |
| Anti-air suppression | Engineer main defense, Recon marking, everyone covering AA | Push air targets into your own AA envelope |
Class-Locked Mode: The Final Exam for Coordination#
In class-locked mode, each class can only use its corresponding weapon types — weapons and duties are forcibly bound. What this mode means:
- Assault cannot moonlight as a sniper and Recon cannot moonlight as a brawler — every role’s irreplaceability is maxed out
- Bad squad composition shows directly in combat power: a squad of four Recons cannot even hold one objective
- It is the touchstone of whether you truly understand class division of labor, and the best training ground for a fixed squad
Working with the Whole Team#
Beyond the squad there is the entire team (64-player-scale Conquest battlefields):
- Push with the main force, but take a flank: the flanks of the frontal push are where a squad is most valuable — a full squad on the flank kills far more than one crammed into the front
- Follow the squad for flag rotations: on respawn, follow the squad leader and never hop objectives alone
- Pass intel upward: after the squad calls a target, have the leader relay it up the channel — battlefield intel must flow vertically
A Training Route for Fixed Squads#
| Week | Training content |
|---|---|
| Week 1 | Everyone practices their class (see the Class System Overview) and learns their own kit |
| Week 2 | Two-person mini-combos (Assault + Support, Engineer + vehicle), practicing the revive and resupply loop |
| Week 3 | Full four-class Conquest, practicing callouts and formations |
| Week 4 | Take the class-locked exam to expose composition weaknesses |
Common Coordination Accidents#
| Accident | Root cause | Fix |
|---|---|---|
| Revive chain deaths | Reviving directly in the open | Drag first, revive inside cover |
| Ammo crate nobody uses | Placed at your own feet | Place it on teammates’ retreat routes |
| Vehicle pushes alone | The tank doesn’t wait for infantry | Bind the push tempo to infantry |
| Intel blackout | Callouts stay inside the squad | The leader relays them upward |
| Four of the same class | Nobody looked at the team when picking | Check the composition the moment you join |