Career Mode Walkthrough#
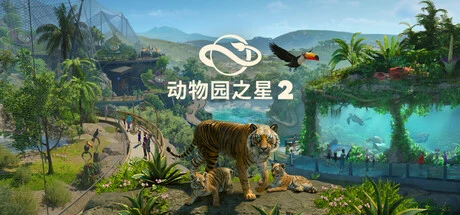
What Is Career Mode#
The Career mode of Planet Zoo 2 revolves around the global story of the fictional conservation organization Fauna and Ecosystems Network (FEN): you play as FEN’s new Conservation Coordinator, running zoos and reserves while gradually taking on bigger conservation stages as the story unfolds.
Career mode matters for more than just being “the mode with a story”: it is the game’s most complete systems tutorial. Push Square awarded the PS5 version a 9/10 while noting that the game has a “steep learning curve” — and Career mode’s guided scenarios are exactly where the four major systems (welfare, building, economy, conservation) are laid out and taught one by one. Starting here is the highest return-on-investment route for newcomers.
An Important Note on the Level List#
The official level count and level names for Career mode have not been announced, and this guide does not invent a level list. Everything below is progression advice built around the confirmed system framework; the actual objectives, locations, and species of each level are subject to the in-game content.
Story Framework: The Coordinator’s Two Venues#
Judging from the officially revealed mode framework, Career mode’s gameplay spans two venues:
| Venue | Gameplay | Related Systems |
|---|---|---|
| Zoo | Park construction, animal care, guest management | The four pillars: welfare, building, economy, reputation |
| Reserve | Conservation projects, habitat restoration, animal releases, research vehicle observation | The wildlife reserve system |
This structure means Career mode will test two skill sets in rotation: inside the park, keep animals healthy and the zoo running well; outside the park, finish projects and carry releases through. If either side lags, story progression stalls.
General Progression Ideas#
Although the level list is unannounced, Career mode objectives fall into a handful of categories, each with its own approach:
Objective Type One: Animal and Welfare Objectives#
The key to “raise a species to a certain state” objectives is securing prerequisites early:
- Check Zoopedia first to confirm every need field for the species.
- Put each of the seven fields in place one by one (see Animal Welfare and Needs System Explained).
- Advance species research — don’t miss the research prerequisites for the Thriving state.
- Verify with behavior readings: once herding, grazing, and natural interactions appear, the objective is within reach.
Objective Type Two: Building and Management Objectives#
The key to “build a facility / reach an income” objectives is sequencing:
- Paths first: finalize the main loop before placing facilities (see Path System and Guest Flow Design).
- Staffing and keeper access should land together with construction (see Staff Management and Roles).
- For income objectives, prioritize the two “low-barrier lines” of donations and in-park spending; leave ticket price hikes until after your reputation has climbed.
Objective Type Three: Conservation and Release Objectives#
The key to “complete a release / complete a conservation project” objectives is the prerequisite cleanup:
- Clear pollutants and invasive plants in the wild area first.
- Get research network coverage in place.
- Self-check the welfare and thriving status of release candidates (see the workflow in Wildlife Reserves and Release Guide).
- Follow up post-release observation tasks with the research vehicle on site.
Objective Type Four: Reputation and Rating Objectives#
The key to “reach a star rating / a score in one pillar” objectives is balance across all four pillars (roadmap in Education, Conservation and Five-Star Reputation):
- Check which of the four pillars is currently lowest and shore it up along its specialization line.
- The education pillar is the most cost-effective weakness to fix.
- Leave buffer for seasonal swings in the welfare pillar, and complete seasonal preparations before the season changes.
Three Tips for Using Career Mode#
- Use it as a tutorial and as a sandbox: the fixed park conditions in Career mode make a superb “controlled experiment lab” — build the muscle memory for welfare setups and shop placement here first.
- Don’t hoard objectives: conservation objectives have prerequisite work (pollution cleanup, research network), so start them as soon as you accept them; stockpiling them makes the prerequisites block each other.
- Screenshot and archive: photograph each completed park layout in photo mode — it is both a memento and a reference library for building zoos in Franchise mode.
Suggested Pacing for New Players#
Given the media consensus on the “steep learning curve”, we recommend this Career mode rhythm:
- Finish every tutorial scenario: don’t skip the tutorials — the coupling between systems (welfare ↔ reputation ↔ income ↔ conservation) is presented in full for the first time there.
- Review after each scenario: which systems did this level use? Leave a one-line note so you can call on it in the next level.
- When stuck, go back to the four pillars: most level objectives are variants of the four pillar numbers; checking the weakest pillar beats random trial and error.
- Get used to the controls: console players should use Career mode to break in the gamepad; if detailed building still feels fiddly, switching to keyboard and mouse on PC works wonders.
- Study the conservation system properly: the reserve content in Career mode is a rehearsal for the long-term gameplay of Franchise mode, so it is worth slowing down to digest.
Where to Go After Career Mode#
Where you head after graduating from Career mode depends on your interests:
| Interest | Recommended Destination | Why |
|---|---|---|
| Long-term management | Franchise mode | Online Planet Hub gameplay, global trading, and weekly community challenges |
| Offline management | Challenge mode | Offline animal market plus management pressure |
| Free building | Sandbox mode | No cash limits, all building and creativity unlocked (see Challenge and Sandbox Mode Guide) |