Lore and Worldbuilding#
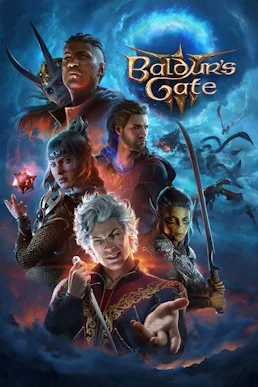
The Nautiloid Prologue to the Invasion#
The story of Baldur’s Gate 3 opens with an illithid raiding ship — a Nautiloid, as the ancient githyanki scouts call it — crashing into the wilderness of the Sword Coast. Your character has been infected in the brain by a parasitic Tadpole and is living on a countdown toward something called Ceremorphosis. The illithid transformation rebuilds the host from the inside out into a new illithid within a matter of days, and your entire adventure revolves around finding a cure before the transformation completes and uncovering who is truly behind this invasion.
This opening matters to the whole narrative: it binds a “countdown to death” together with “choice” — you must survive against a limited clock while facing the many temptations the parasite dangles in front of you. The game does not measure that countdown with a number ticking every second, but through story progression after long rests and the triggering of key plot beats, so you are never really robbed of your own exploration pace — yet “transformation” remains the ultimate threat hanging over your protagonist and every companion.
The Three Acts and the Main Storyline#
The main story is cleanly divided into three acts by region, and each act peels back another layer of the true face of the Absolute. The core narrative engine is three Netherstones: the key relics capable of controlling an entire army of illithid slaves.
| Act | Main Areas | Core Antagonists | Story Goal |
|---|---|---|---|
| Act 1 | Wilderness, Underdark, Mountain Pass | The Absolute’s goblin outposts, the hag, githyanki assassins | Find a cure, unravel the tadpole mystery, first encounter with the Absolute’s forces |
| Act 2 | Shadow-Cursed Lands, Moonrise Towers | Ketheric Thorm, the Gauntlet of Shar | Seize the Netherstone Ketheric holds, rescue or dispose of the Nightsong |
| Act 3 | Baldur’s Gate Lower City and Upper City | Gortash and Orin, two of the Chosen of the Dead Three, and the Netherbrain itself | Gather all three Netherstones, final battle against the Netherbrain at the Nautiloid |
The level design of the three acts is not a simple march across a map — each act is built around one “holder of a Netherstone”: Act 1 shows you the Absolute’s foot soldiers, Act 2 confronts you with Ketheric, who commands the undead legion, and Act 3 puts you against Gortash and Orin, who manipulate city politics and assassination. Only once all three Netherstones are in your hands can you board the Nautiloid and face the Netherbrain head-on.
The Absolute and the Chosen of the Dead Three#
Behind the entire invasion sits a secret organization known as the Absolute. What truly pulls every string is a colossal Netherbrain lurking deep within the Nautiloid — it weaves a mind-control network out of those it has infected, and issues its commands through three “Chosen of the Dead Three” stationed across Faerûn.
| Leader | Role | Power Held | Where You Fight Them |
|---|---|---|---|
| Ketheric Thorm | Commander of the undead legion | The undead legion tied to Moonrise Towers and the faith of Shar | Act 2, Shadow-Cursed Lands / Moonrise Towers |
| Enver Gortash | The core of city intrigue and politics | Controls the nobles of Baldur’s Gate’s Upper City and the Steel Watch | Act 3, Wyrm’s Rock Fortress / Upper City |
| Orin | The executor of assassination and sacrifice | Killers of Bhaal’s temple; controls companions through binding and blackmail | Act 3, Temple of Bhaal |
The three of them form the main narrative resistance of the game’s back half, and each of them serves the Netherbrain for private reasons of their own. Against Gortash you can fake an alliance and backstab him at his coronation, or take the head-on confrontation route; against Orin, she will try to abduct one of your companions and use them as leverage. These choices directly reshape the path Act 3 takes, and they are the clearest expression of “choices change the story.”
Where the Three Netherstones Go#
Netherstones are the ticket to the final battle — no route lets you skip the step of gathering all three relics.
| Netherstone | Holder | How to Obtain | Key Choice |
|---|---|---|---|
| First | Ketheric Thorm | Defeat Ketheric in Act 2 | Can persuade him to surrender through dialogue before the fight, skipping the first phase |
| Second | Gortash | Confront Gortash in Act 3 | Can fake an alliance and backstab him after the coronation; or attack head-on |
| Third | Orin | Duel Orin at the Temple of Bhaal in Act 3 | Orin kidnaps a companion as leverage, so you must deal with the rescue step first |
Illithids and the Ceremorphosis Mechanic#
Illithids are the core setting of the entire work’s worldbuilding and the survival threat that runs through it from beginning to end. Understanding how they act on a character helps you judge which choices are “safe” and which are “the price of a different way of living.”
- Tadpole infection: every chosen character has a tadpole planted in their brain, and it steadily pushes toward Ceremorphosis. Once a tadpole is implanted inside the skull, the host gains partial Psionic abilities — and that is exactly where the later “Illithid Powers” skill tree comes from.
- Ceremorphosis: when the tadpole devours and replaces the host’s entire consciousness, the host physically transforms into an illithid. This process means the total extinction of soul and personal identity, and it is the heaviest threat in the narrative.
- Illithid Powers and the tadpole path: over the course of the adventure you keep acquiring more tadpoles, and you can inject them into your companions or yourself to unlock stronger psionic abilities. But every time you draw on that power, you move closer to the narrative metaphor of “being devoured by the power you took” — the game never hands you a simple good-versus-evil verdict here, and leaves the contradiction for you to weigh yourself.
The Nightsong and the Clash of Faiths#
The narrative core of Act 2 is a side story about faith and choice: the fated duel between two deities, Shar and Selûne, falls upon a being called the Nightsong.
- Shadowheart’s path of faith: raised from childhood by worshippers of Shar, she has spent her life trying to please Shar. In the Gauntlet of Shar she must face the choice of whether to end the Nightsong’s life.
- The Nightsong: as the central subject of Shar’s trial, she is deeply bound to Shadowheart’s choice of faith. Sparing her means Shadowheart may turn away from Shar and toward Selûne’s redemption; killing her makes Shadowheart a firmer inquisitor of Shar.
- Impact on the story: this choice directly changes Shadowheart’s allegiance, her class leanings and her later personal ending, and it also shifts the stance of the Moonrise Towers garrison and the difficulty of the Act 2 climax.
Githyanki and Orpheus#
Against the backdrop of the illithid invasion, the githyanki — a people who are the illithids’ hereditary enemy — play a role in the main story that cannot be ignored. The githyanki assassins and the crèche of Act 1, together with the Astral Prison of Act 3, all point toward one key figure: the imprisoned githyanki prince Orpheus.
- Who Orpheus is: he is sealed inside the Astral Prison, and he is the one being capable of standing against the Netherbrain through his own inner power in the final battle.
- Lae’zel and Orpheus: Lae’zel’s personal fate is tightly bound to whether Orpheus is freed. Rescuing Orpheus means she may join the rebellion against the githyanki queen Vlaakith; abandoning him keeps her loyal to the queen.
- His role in the final battle: Orpheus serves as a key ally in the final battle, and whether he survives directly determines whether you can end the Netherbrain threat in another way.
Bhaalspawn and the Dark Urge#
If your protagonist takes the Dark Urge background, the story gains a hidden bloodline thread: the protagonist is in fact a descendant of Bhaal, the god of murder. This route runs the inner conflict of “the urge to kill what you love” through every scene, forcing you at each key moment to decide whether to give in to the call of your blood.
- Alfira’s death: the first major test of the urge in Act 1, which decides whether you can resist the urge at all.
- The Temple of Bhaal and god-slaying: the climax of the Temple of Bhaal in Act 3 is the core of the “resist the urge” route — you must face and ultimately kill your father Bhaal to truly shake off the curse and become a free person.
- Ending divergence: giving in to the urge, resisting the urge, and “resisting while also completing the illithid sacrifice” lead to three entirely different ending cinematics.
The Nine Hells and Raphael#
Beyond the main story, a guest-tier slice of the nine hells also forms an important optional plotline. The devil Raphael appears before you offering contracts and bargains, and shows up in Act 3’s House of Hope. The House of Hope is a high-intensity optional boss area where you can steal the contract and claim the Hellfire Armour and the Orphic Hammer, and completing it directly affects how Act 3’s final battle plays out and how your companions’ endings land.
How Dice Rolls Carry the Narrative#
This game’s worldbuilding is not delivered purely through dialogue text — it is threaded through with the “dice rolls” of the D&D 5e ruleset. Every key beat that decides where the story goes turns into an ability check, and the Difficulty Class (DC) of that check is tied directly to your ability scores.
- Dialogue checks: Charisma-based checks such as Persuasion, Intimidation and Deception decide whether you can resolve a conflict without fighting, or pry hidden information out of someone. Pushing your main character’s Charisma high therefore usually means more “bloodless” options at the narrative level.
- Exploration checks: Perception and Insight rolls decide whether you spot hidden clues, traps and secret rooms, unlocking deeper story layers buried under throwaway dialogue.
- Active and passive: with high Passive Perception you automatically get a “you notice something unusual” prompt when you approach certain scenes, letting you pick up on buried foreshadowing without spending any action at all.
These check results directly rewrite the world you see: a failed roll may cost you a character’s personal storyline forever, while a successful one may let you talk Ketheric into surrendering before the fight and skip the whole battle. Understanding this signature feature — “checks decide the narrative” — matters more here than memorizing any single plot event.
Origin Characters and Narrative Perspective#
The worldbuilding also shows itself through multiple perspectives: the origin characters you can play as or recruit each have independent motives and dedicated quest lines, so the same main story reads differently through different eyes.
| Character | Background | Core of Their Personal Quest | Connection to the Game’s Central Theme |
|---|---|---|---|
| Shadowheart | A worshipper of Shar | The fate of the Nightsong | Redemption and abandonment of faith |
| Astarion | A spawn forced into servitude by a predatory vampire | Whether to complete the Ascension ritual | The price of freedom and revenge |
| Gale | A wizard of Waterdeep, with a force that devours the Weave dwelling inside him | Whether to swallow the power of the Netherese Crown | The balance between ambition and restraint |
| Lae’zel | A githyanki warrior | The fate of Orpheus and rebellion against the queen | Self-identity and escape from destiny |
| Wyll | A warlock who signed a pact with a devil | Whether to tear up his contract with Mizora | The trade-off between sacrifice and duty |
| Karlach | A tiefling fitted with an Infernal Engine | The survival countdown from her overheating engine | Fall and rebirth, body and will |
These characters’ backgrounds are not optional piles of flavor — each one reflects a different facet of the theme in the mirror the main story holds up, the illithid invasion: Shadowheart is about faith, Astarion about how the enslaved take back their freedom, Gale about restraint and ambition, Lae’zel about colonization and rebellion, Wyll about the price of a contract, and Karlach about a dying body’s hunger for life.
How Player Actions Steer the Story#
This worldbuilding rests on the premise that “choices really do change the story.” Below is a set of verifiable criteria that actually hold in this game:
- Companion recruitment is exclusive: some companions you fail to recruit in Act 1 can never join later. Choosing to slaughter the tieflings in the grove conflict, for example, leads to the evil route where Minthara joins, but drives good-aligned companions away.
- Personal quests are bound to endings: every origin companion has an independent personal quest line, and leaving it unfinished means that companion gets no ending cinematic at all — or gets a bad ending.
- How you fight the Netherbrain: in the final battle, the allies you hold, whether you freed Orpheus, and whether you completed the Bhaal route all decide which ending path you can choose to finish the Netherbrain.
- Timed choices: quests such as the Foundry hostage rescue in Act 3 have a real time window, so handle them before advancing the main story and save early.