Saga Anderson’s Campaign#
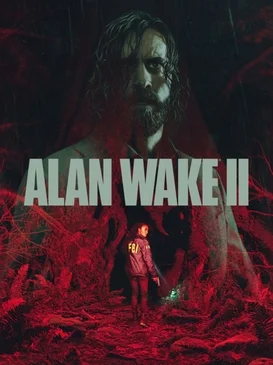
Alan Wake 2 alternates between two protagonists, Saga Anderson and Alan Wake. This page covers Saga Anderson’s investigation: she is an FBI agent who travels to Bright Falls with her partner Alex Casey to investigate a string of murders. Her story advances through the “Return” chapter series, and its gameplay core is not spatial puzzling but evidence gathering, profiling and breaking armour with light. Here we lay out the systems unique to Saga’s campaign and the judgement criteria behind every action.
Where Saga’s Campaign Sits in the Game#
Saga’s line and Alan’s line play very differently and should never be approached the same way. The table below separates them.
| Point of Comparison | Saga Anderson’s Campaign | Alan Wake’s Campaign |
|---|---|---|
| Main setting | The Bright Falls area of the real world | The twisted New York of the Dark Place |
| Core tools | The Mind Place, the Case Board, profiling | The Writer’s Room, scene rewrites |
| How it progresses | Investigation and evidence-chain deduction | Observing the environment and rewriting the script |
| Main threat | The Taken and related cult presence | The Dark Presence and the double known as Scratch |
| Puzzle logic | Deduction through profiling and the Case Board | Restructuring scenes through rewrites |
Chapter Progression Overview#
Saga’s campaign follows the “Return” chapter series as its main thread, moving outward from the starting point of the Bright Falls investigation toward the key nodes at Cauldron Lake. The summary below covers stages and key beats; the exact pacing depends on what actually plays out in-game.
| Stage | Main Setting | Key Content |
|---|---|---|
| Prologue | The forest outside Bright Falls | Saga and Casey find the victim, learn the case background and meet the Taken for the first time |
| The “Return” chapters | Bright Falls, Watery and the Cauldron Lake area | Saga gathers evidence step by step, pins the clues to the Case Board and links them together |
| Key encounter | The shore of Cauldron Lake | Facing Nightingale, who has been taken by the darkness |
| Finale choice | Cauldron Lake | Making a choice at the critical moment that shapes how things go |
The Mind Place and the Case Board#
Saga has access to the Mind Place, a space for sorting things out that stands apart from reality, and it is her core investigative tool. It costs no real-world supplies and is used to file clues, upgrade and deduce.
| Tool | What It Does | Criteria for Use |
|---|---|---|
| Case Board | Pins clues and evidence together to sort out relationships and event logic | Return to the board every time you get new evidence and check for new deduction branches |
| Profiling | Runs psychological deductions on key figures to glimpse motives and hidden information | Handle it first when a deducible branch appears; it often comes with new clue pointers |
| Map | Marks discovered but unclaimed collectibles and enterable areas | When stuck or when you feel something is missing, check the map markers back in the Mind Place |
| Upgrades and gear | Spends collected fragments and capacity boosts on combat sustainability | Put upgrades into light efficiency and ammo capacity first |
Criteria for use: whenever you do not know where to go in the real world, fall back to the Mind Place and check the Case Board and the map. The overwhelming majority of “stuck” moments are not about a road you failed to find, but about clues you have not yet integrated, or profiling branches still locked behind something. You can verify this again and again as you play.
How to Use Profiling#
Profiling is a form of deduction unique to Saga. It is not simply story presentation; it is an actual mechanic that shapes where your exploration goes.
| Situation | Action | Notes |
|---|---|---|
| Facing a suspect or witness | Enter the Mind Place and choose profiling | Deduce the event from the other person’s perspective and gain a new line of inquiry |
| The Case Board lacks clues | Gather more evidence in the real world first, then come back to profile | If profiling will not advance, your evidence usually is not complete yet |
| Several profiling targets appear | Profile them in the order of the event timeline | The order itself often clarifies cause and effect; skipping one can cost you a key branch |
Breaking Armour with Light: The Core Combat of Saga’s Campaign#
Combat on Saga’s side revolves around “light and darkness”. The core mechanic is this: enemies wear armour of darkness. You strip it with a light source (your flashlight) first, then shoot them once they stagger, and only then do you deal full damage. Shooting an unbroken enemy outright costs you a great deal of damage.
| Combat Step | Criteria for Action |
|---|---|
| Meeting an enemy | Shine the flashlight first, aiming at the dark armour covering them |
| The enemy staggers or breaks | Switch the light off immediately and open fire to avoid wasting batteries |
| The enemy closes in | Dodge to create distance first, then turn back to beam and shoot |
| Facing several enemies | Retreat into a narrow passage or corner so they queue up, and break them one at a time |
| Elite-type enemies | Reach for consumables such as flares rather than grinding away with your batteries |
Resource Management#
Supplies on Saga’s side come mainly from stashes and scene pickups. Her resources are somewhat more plentiful than Alan’s, but choices still have to be made. Figures depend on your actual playthrough, so what follows is a way of thinking about trade-offs.
| Resource | Use | Management Criteria |
|---|---|---|
| Pistol ammo | Main damage output after breaking armour | Always keep a reserve for sudden encounters |
| Shotgun ammo | Close-range crowd clearing | Use it up close or in tight spaces, and spend it sparingly |
| Batteries | Flashlight endurance | Switch the light off the moment an enemy breaks, saving batteries for the next fight |
| Flares and flash items | Area control, dealing with elites | Bring them out against groups or elites and keep them as your trump card otherwise |
Management approach: take stock of ammo and battery levels after each story sequence. If batteries run low, lean on ambient light and dodging to disengage rather than forcing the flashlight against the darkness. Top up your supplies whenever you are near a safe room before entering the next area.
Stashes and Lunch Boxes#
Saga’s campaign carries a large number of “stashes” and lunch-box-style collectibles. What unites them is that they are not random drops but sources of long-term attribute growth.
| Collectible | Effect | Collection Criteria |
|---|---|---|
| Lunch boxes | Raises maximum health or ammo capacity and similar attributes | Their positions are relatively fixed, so detours are worth it |
| Cult stashes | Provide ammo and supplies; some need a code | When you see a locked or symbol-marked stash, look for hints in the nearby environment |
| Manuscript pages | Fill in the story; some hint at later developments or supply locations | Read them in passing even if you only skim one line |
Regional Differences and Exploration Criteria#
Saga’s campaign moves between several major regions, each with its own exploration priorities.
| Region | Traits | Exploration Focus |
|---|---|---|
| Bright Falls | Saga’s starting point for the investigation, deliberately paced | The police station and the town’s shops and diner supply both clues and resources |
| Watery | A lakeside community and docks; wide and flat with many deep corners | Enterable interiors often hide supplies, so search any building you can open before pushing the story |
| Coffee World | A seemingly harmless coffee-themed park | Accessible facilities and back-of-house passages often hide key items |
| Valhalla Nursing Home | Multi-storey interiors plus courtyards, with complex spatial layering | Clear rooms floor by floor, then change floors by the stairs rather than running up and down repeatedly |
| Cauldron Lake | Lakeside wilderness echoing the setup of the original | The trails fork often, so follow side branches before heading to the main objective |
Key Encounter: Nightingale#
Early in Saga’s campaign you face someone taken by the darkness: Nightingale. This is not a common grunt but a major, pressure-heavy encounter.
| Phase | Response |
|---|---|
| The Taken closes in | Keep your distance and burn the armour away with the flashlight first |
| It enters a staggered state | Switch off the light and pour concentrated fire into it |
| The field gets chaotic or you are surrounded | Use whatever usable light sources and cover the area offers, retreating as you fight |
| Running low on ammo | Top up ammo and batteries before you even reach that area |
General Criteria for Pushing Saga’s Campaign Forward#
The scattered criteria above fold into a short executable order:
- On reaching each new real-world region, circle its outer edge first, sweeping enterable interiors and forks, then push the main story.
- After gaining new evidence, return to the Mind Place, pin the clue to the Case Board and try profiling.
- When profiling says it cannot advance, go back to the real world and gather more evidence.
- Before a major encounter or a new chapter, return to a safe room and top up ammo and batteries.
- When you suspect you missed something, check whether the Mind Place map still shows collectibles not marked as found.